 If you were born after 1980, the phrase “digitize your slides” may seem strange. Maybe you have never even seen or touched a photographic slide. However, for those of us a little older, digital cameras and smartphones were once the stuff of science fiction. Years ago, we actually had to wait sometimes weeks or months to see the images captured on film.
In our house, the anticipation of seeing our photos after they were returned from being developed was only heightened because they were slides and not prints. Each slide had to be placed into a slide carousel, the projector and the screen had to be set up and the family gathered in a dark room to watch the “slide show”.
As the years went by, most people started using new technology that was faster and easier for looking at their photos, however for many of us, there are boxes or carousels full of slides that we would love to bring into the digital age. So in this article, we will discuss several ways to digitize your slides!
First, let’s tackle the Do It Yourself (DIY) methods and then we will discuss some options for having them professionally scanned.
Digitize Your Slides DIY
Option 1
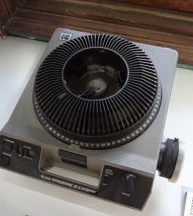 If you have a working slide projector, you can project your slides and then take a digital photo of the projected image. Do this in a very dark room to get the best outcome. If you can take your photo within the borders of the image, you won’t even need to crop them. If you need to capture the edges of the photo, you may need to crop the photo after you have taken it. On smartphones and most built-in computer photo applications, you will find a cropping tool to help you get it just right.
Option 2
Amazingly, you can use a slide sorter or viewer or a lightbox so you can view your slides and then take a photo of any you want to use in your project. Today’s digital cameras and smartphones are high-resolution enough that a photo of a slide should be large enough for including in a memoir or autobiography. Here’s how you do it:
- Place your slide on the light source (slide sorter, viewer, or lightbox).
- Take a digital photo of the slide. You will need to experiment a little to get this right.
- Take shots with and without zoom and from different distances from the slide to see what works best.
-
- Point the camera straight at the slide and do your best to make sure it is level or parallel to the slide so it doesn’t get distorted.
- Use a tripod or the self-timer if you have trouble keeping the camera steady.
- Use the Crop tool on your camera or computer to fine tune the edges or zoom in on the best part of the image.
If you want to create your own lightbox, search the web for “create your own slide viewer” to find a variety of instructions.
Option 3
Use a scanner that is dedicated to scanning slides or negatives or a multipurpose scanner that has the ability to scan slides. They range in speed, resolution, and of course price. Here are a few that caught our eye on Amazon.com.
All of these scanners will include software either within the device or for use on your computer to allow you edit and color correct the images.
DIGITIZE YOUR SLIDES – Paid Options
Option 1
There are numerous scanning services that can be found online. Look for one that provides detailed instructions on how to package and ship your slides. ScanDigital is a company that we have used and were quite happy with the results. Use Coupon Code “MemoirHelper” for a 10% discount on ScanDigital.com services. There are many other choices if you do a Google search for “photo scanning services” or “slide scanning services”.
Option 2
Big Box and Drug Stores: Walmart, Sam’s Club, Target, CVS, Walgreens and other big chains often have photo services. Usually, they send photos and slides “out” to be scanned, which means it’s not really being scanned locally. The prices are quite reasonable.
Option 3
Local Scanning Services: These are getting harder to find, but you can try a search for “photo scanning” on yellowpages.com. Make sure when you call to inquire about their services, that you ask if they do the scanning at their store, rather than sending it out. One of the reasons for having it done locally is to avoid the risk of your photos or slides being “lost” in transit. It’s highly unlikely, but something to consider when thinking of your most valuable images.
It’s easy to put off scanning your old slides because it seems like a big job. Almost everyone we know finds it well worth either the time or the money. There are treasures in those slides that are great fun to revisit and to share.
Once you have them scanned, they will be ready for your personal or family history project as well as other fun customized photo gifts.

Let us know what you think!