 We all know how it usually goes. Parents start out wanting to record every moment of their child’s journey. In the beginning, some parents keep those baby books up-to-date and the photos organized. Regardless of whether or not you were on top of those details at the beginning, if you’re like most parents, life starts getting in the way. Baby books and scrapbooks are left unfinished and photos and videos are stuck on your phone or dumped into a folder on your computer.
It doesn’t make you a bad parent if you don’t have beautiful baby books, scrapbooks, or photo albums of your children. It probably just means your busy making memories rather than putting them into fancy books! But…
What if you found a quick and easy way to preserve digital memories for your kids in lieu of baby books and scrapbooks?
 Would you be willing to take a minute or two most nights before you turn out the lights? The system I describe below not only saves you time but can also reduce any stress you feel about storing OR tossing your child(ren)’s… shall we call it paperwork?! Those drawings, first handwriting papers, cards from Grandma, and many other keepsakes take up space and you may find yourself wondering what to keep and what to toss. With this system, you can take a photo or even multiple photos of the “thing” and then toss it. You’ll have it organized and can find it quickly if your child(ren) happen(s) to ask about it. Show him/her the special scrapbook that you keep with you all the time.
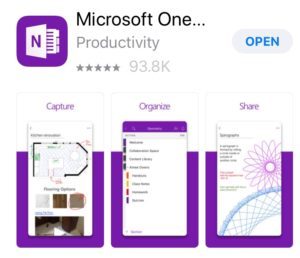
If you have a smartphone or a tablet, you can start creating an organized multimedia journal using the Microsoft OneNote app. It’s free and can be used on one or all of your devices. Once you have it set up, you will be able to quickly add notes and photos into an your “Notebook”. The beauty of this is not only that you have an organized system for collecting the memories of your child(ren), it’s that you can also convert the entire notebook to a PDF document or you can export sections to Microsoft Word should you ever want to dress it up a little more. You will need your computer and the desktop version for those features.
- Start by installing the app on your smartphone or tablet. Download OneNote.
- Once you have it downloaded, create a new Notebook by clicking or tapping “+”. If you haven’t signed in already, you will be prompted to Sign-in. Click the Sign-in link and if you have a Microsoft account, use it to sign in. If you don’t, click Create One. Again, this is free.
- Once you are signed-in, enter the name of the child as the new notebook name. You can choose a notebook color or go with the one that is assigned by default.
- Tap on “+ Section” to add a new section. You will want to add a section for each area you want to cover in this child’s life. Here are a few examples: School, Funny Things Said, Sports, Great Questions, Music, Art, Grandparents. Your sections will be unique to each child and you will be able to add to or edit these anytime. Within each section, you will be adding individual notes and images on a regular basis.
Here are the steps for Making Digital Memories!
- At the end of each day (or let’s say most days), take a moment and scan your memories of the day. Is there anything that stands out about your child(ren)? It might be something funny that was said or an interesting question that was asked. Maybe it was performance highlight or a “first” of some kind. Did you take any photos, or did your child(ren) draw, build, or create something of which you can snap a quick photo?
- If nothing comes to mind, turn out the lights! However, if something does come to mind, open the OneNote App on your phone or tablet.
- Choose the Section or Add (+) a new section.
- Click “+ Page” and OneNote will open a blank page.
- Type a title for the page. It doesn’t have to be perfect, just a recognizable subject.
- Then in the space below the title, type the story OR if you will be adding a photo or photos, type a description.
 If you are adding a photo, tap the camera icon below the writing area.
- For photos already on your device, tap “From Library”. If you need to take a photo of whatever it is your child created, was awarded, or whatever represents this memory, tap “Take Picture”.
- Choose “Whiteboard” “Photo”, or “Document” from below the photo. “Document” and “Whiteboard” will automatically attempt to crop the image. This can be a real timesaver. Try each of the options to see which looks the best.
 If you need to crop your photo, tap the crop symbol at the top of the photo. Place your finger on any corner and drag it to adjust the edges. Tap the checkmark ✔ to see your cropped photo. If you like it, hit back (<) symbol in the top left corner to return to your page. Once you’ve done that, you cannot crop the image again, so make sure you’re satisfied before you do it.
- That’s it! Now you can turn out the lights!
PS. Please share your thoughts below. We would love to know if you have a system that works for you or if you are still struggling with preserving memories about your child(ren).


Let us know what you think!